When I first started setting up my home entertainment system, I quickly realized how vital coaxial cables are. They are the silent heroes behind our TV, internet, CCTV, and satellite connections. But here is the thing: even the best equipment can fail to deliver if your coaxial cable setup is not done correctly.
The biggest problem is signal loss. It can sneak in during installation. Poor connectors, incorrect cable lengths, or even a tight bend can weaken the signal. That means blurry images, glitchy internet, or dropped connections. I have experienced it myself, and it can be frustrating.
That is why I decided to write this blog. One question always comes up when people deal with coaxial cables: should you install it yourself or hire a professional? In this blog, I will help you explore both options so you can decide what is best for your setup while keeping your signal strong and stable.
What Is A Coaxial Cable?
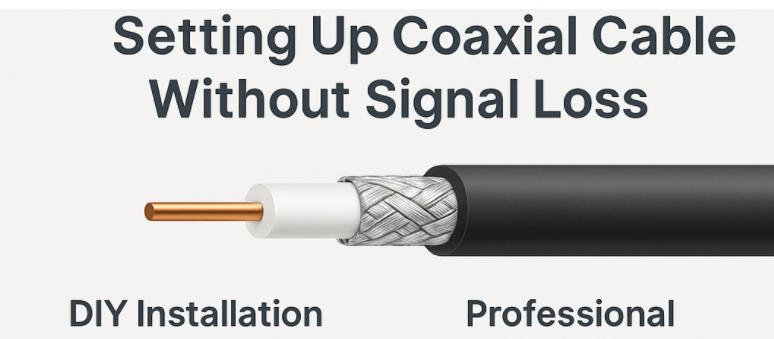
From my experience, a coaxial cable is one of the most reliable ways to transmit high-frequency signals for TV, internet, satellite, and CCTV systems. It has a unique layered structure. Inside, there is a copper core that carries the signal. Surrounding that is an insulating layer, a metal shield that blocks interference, and an outer plastic jacket that protects everything. This design helps prevent signal loss and ensures consistent performance, especially over longer distances.
Types of Coaxial Cables and Their Use Cases
There are several types of coaxial cables, and choosing the right one makes a big difference. Here are the most common ones I’ve worked with:
- RG6 – This is the most commonly used type in modern homes. It has a thicker core and better shielding, which makes it ideal for high-definition TV, internet, and satellite connections. If you’re doing a typical home installation, RG6 is usually the best choice.
- RG59 – This cable is older and has a thinner core. It works fine for short distances and lower-frequency signals, such as analog CCTV systems. But I would not recommend it for modern TV or internet setups.
- RG11 – This cable is even thicker than RG6 and is designed for long-distance runs, like from the main line outside your house to multiple rooms inside. It offers the least signal loss but is harder to work with due to its stiffness.
How Signal Travels and Why Quality Matters
A coaxial cable carries electrical signals in the form of radio frequency (RF) waves. The inner conductor carries the signal, while the outer shield protects it from outside interference, like electromagnetic noise from nearby power lines or electronic devices.
If the cable or connectors are poor quality, or if the cable is bent too sharply or damaged, that signal can degrade. This means your video may freeze, your internet could slow down, or your security footage might lag. That’s why I always stress the importance of using good materials and proper installation methods. Whether you do it yourself or hire a pro, signal quality should never be an afterthought.
What Are Causes of Signal Loss in Coaxial Cable Installations
Before deciding between a DIY or professional coaxial cable installation, it’s important to understand what can actually cause signal loss in the first place. Even the best cable won’t perform well if it’s installed incorrectly or compromised by environmental factors. Whether you’re handling the job yourself or hiring a technician, avoiding these common pitfalls is key to maintaining strong, stable signal quality.
What Are the Causes of Signal Loss in Coaxial Cable Installations?
1.Improper Cable Length and Signal Attenuation
Every coaxial cable has a limit to how far it can carry a signal before it begins to weaken this is called attenuation. The longer the cable run, the more the signal degrades. If you’re using RG59 or RG6 for a long-distance setup without amplification, you’re likely to experience noticeable loss. That’s why cable length needs to be carefully planned based on your setup.
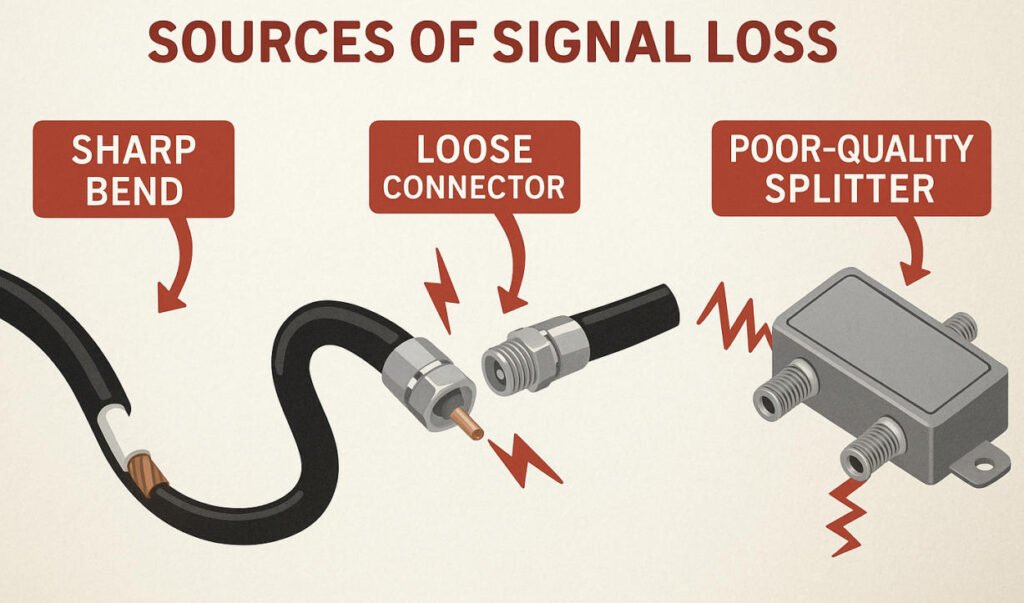
2.Poor Quality Connectors or Improper Crimping
Connectors are often the weakest link in a coaxial cable system. Using low-quality connectors or not securing them properly during crimping or compression can result in loose connections, signal leakage, or even total signal drop. I’ve seen many DIY installs suffer from this one issue alone so using the right tools and techniques is non-negotiable.
3.Sharp Bends, Kinks, or Crushing of the Cable
Coaxial cables aren’t meant to bend sharply or be pinched. Doing so can damage the internal shielding and dielectric layer, which disrupts the signal path and increases loss. Whether you’re routing cable through walls or around corners, always use wide curves and avoid high-pressure contact points.
4.Electrical Interference from Nearby Devices
Because coax cables carry high-frequency signals, they’re vulnerable to electromagnetic interference (EMI). Placing your cable too close to power lines, appliances, or wireless routers can introduce noise into the signal. Shielded coax cables help, but proper planning of the cable path is just as important.
5.Use of Splitters and Amplifiers
While splitters and amplifiers are useful for multi-room setups, they can also be a source of signal loss if used incorrectly. Low-quality splitters can weaken the signal at each output. Similarly, amplifiers may boost the signal but they can also amplify noise if not placed correctly. It’s a delicate balance that pros usually get right, but DIYers must approach with care.
What Are the Pros and Cons of DIY Installation?
Once we understand the potential causes of signal loss, the next step is to decide who should handle the installation. Many people, including myself, consider doing it themselves to save time and money. DIY installation can absolutely work if the setup is simple and you are confident using the right tools. However, it is not without its risks. To help you weigh the decision, here is a breakdown of the pros and cons of DIY coaxial cable installation based on my experience:
| Pros | Cons |
| Cost Saving – No labor charges or service fees. | Risk of Signal Loss – Mistakes in installation can lead to poor performance. |
| Flexible Schedule – Do it when it’s convenient for you. | Tools Required – You will need crimpers, cutters, testers, and quality connectors. |
| Hands-On Learning – A great way to learn basic cabling skills. | Time-Consuming – Especially if it is your first time or if issues arise. |
| Control Over the Setup – You can customize routing and appearance. | No Warranty – If something goes wrong, there’s no professional backup. |
| Good for Simple Setups – Ideal for short runs or one-room connections. | Troubleshooting Can Be Difficult – Diagnosing weak signal or connection problems may be frustrating. |
DIY installation is best suited for those with some experience, the right tools, and a relatively short or straightforward setup. If your needs are more complex, you may want to consider professional help to ensure optimal performance and long-term reliability.
What Are the Tools and Materials Needed for DIY?
Once I decided to try installing coaxial cable myself, I quickly realized that having the right tools and materials makes all the difference between a clean, reliable setup and a frustrating one full of signal problems. Whether you’re wiring up a TV, internet modem, or security system, being properly equipped helps reduce signal loss and saves time. Here’s what I’ve learned you’ll need to get the job done right:
Essential Tools and Materials for DIY Coaxial Cable Installation
Recommended Cable Types
- RG6: This is the best all-around choice for most DIY projects, especially for TV, cable internet, and satellite systems. It has better shielding and lower signal loss over longer distances than older types like RG59.
- RG11 (optional): Great for very long cable runs (over 100 feet), but it’s thicker and harder to work with.
Connectors
Compression F-Connectors (Pro-grade): These provide a tight, weather-resistant seal and maintain proper signal shielding. Avoid cheap push-on connectors—they’re easy to install but often result in signal leakage and interference.
Splitters
High-Quality 2-way or 3-way Splitters: Look for ones labeled as “digital” or “5-1000 MHz+” for TV and internet use. Cheaper splitters often weaken the signal and introduce noise. Pro-grade models maintain better impedance matching and shielding.
Basic Hand Tools
- Coax Cable Stripper: Precisely removes the outer layers without damaging the inner conductor.
- Compression Tool / Crimper: Essential for attaching connectors securely.
- Drill with bits: For routing cable through walls or furniture.
- Fish Tape or Wire Puller: Helps feed cable through walls, ceilings, or conduits.
- Coaxial Cable Tester: Verifies signal continuity and helps troubleshoot issues before finishing the job.
Why Quality Matters
Using professional-grade connectors and splitters isn’t just about durability,it’s about signal integrity. These components maintain shielding, reduce interference, and ensure the signal path is clean and stable. In contrast, cheap parts especially push-on connectors can cause signal leaks, interference, and even total dropouts.
How to Do a Low-Loss DIY Installation Step by Step?
Once you have all the right tools and materials in hand, the next step is making sure the installation is done properly. A few simple mistakes can result in serious signal loss, even with high-quality cable. To make sure you get the best performance from your coaxial setup, here is a step by step guide on how to install it yourself while keeping signal loss to a minimum.
How to Do a Low Loss DIY Installation Step by Step
Step 1: Planning the Route
Plan your cable path carefully before starting. Know exactly where the cable needs to go and measure the total length accurately. Add a little extra length to allow flexibility. Keep the overall cable run as short as possible to reduce signal attenuation. Avoid running coaxial cable parallel to electrical wires. If they must cross, do it at a 90 degree angle to reduce interference.
Step 2: Running the Cable
When pulling or routing the cable, avoid sharp bends, kinks, or crushing. Coaxial cable has a layered structure that needs to stay intact for proper performance. Use gentle curves when going around corners. Secure the cable using plastic clips instead of tight staples. Staples can pinch or damage the cable jacket. Make sure the cable is not pulled too tightly or placed near sources of heat or abrasion.
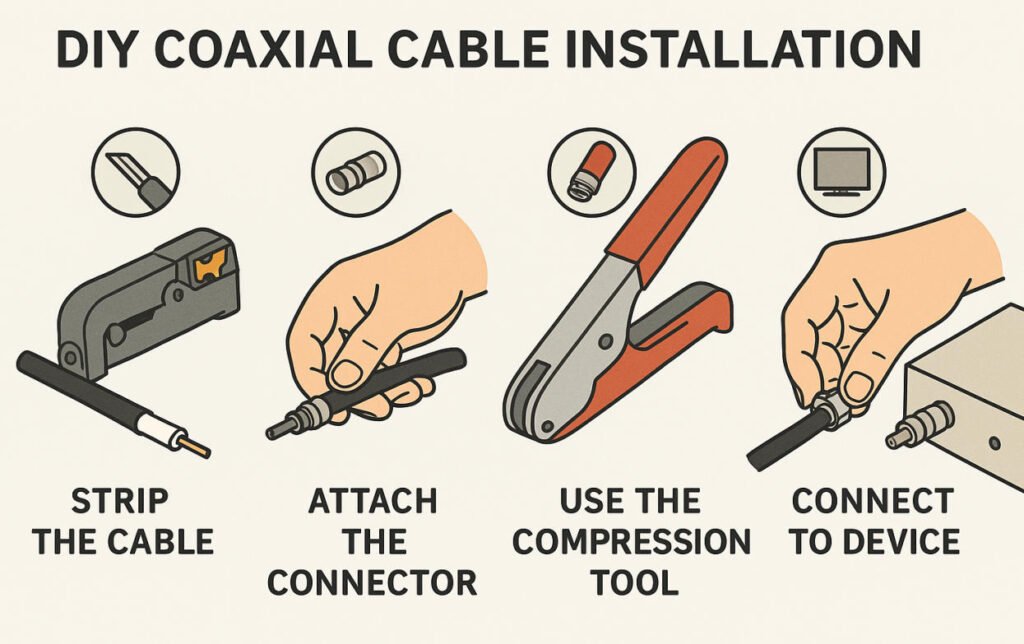
Step 3: Terminating the Connectors
Strip the coaxial cable carefully using a proper cable stripper. Expose the inner conductor and fold the braided shielding back evenly over the outer insulation. Do not cut it off. Leave about one quarter inch of the center conductor exposed. Use compression style F connectors and a compression tool to attach them securely. This ensures a tight connection with minimal signal leakage and much better durability compared to twist on or push on connectors.
Step 4: Testing the Connection
Once the connectors are attached, check each end visually. Make sure the center conductor is straight and not touching the shielding. Use a coaxial cable tester to check for continuity and short circuits. If you are connecting to a modem or set top box, look at the signal strength readings in the settings menu to confirm that the signal is strong and stable.
What Are the Pros and Cons of Pro Install ?
While DIY installation can be a great option for some, I know from experience that there are situations where calling a professional just makes more sense. When the setup gets more complex or performance is critical, having someone with the right tools and training can save a lot of time and frustration. Here’s how I see the pros and cons of hiring a professional to install coaxial cables.
Professional Installation: Pros and Cons
| Pros | Cons |
| Expertise and Experience – Professionals know how to avoid signal loss and handle complex setups with ease. | Higher Cost – You will pay for labor, service fees, and possibly materials. |
| High-Quality Tools and Materials – They use pro-grade cables, connectors, and testers for the best performance. | Less Control – You may not have as much input on cable routing or aesthetics. |
| Faster and Cleaner Installations – The job gets done quicker and usually looks better. | Scheduling Required – You may need to wait for availability, especially during busy seasons. |
| Reliable Testing and Troubleshooting – Pros can detect and fix signal problems right away. | Overkill for Simple Setups – For a basic single-room job, a professional might not be necessary. |
| Warranties or Service Guarantees – Many installers offer guarantees in case issues come up later. | Limited Customization – Some installers may follow standard practices instead of custom preferences. |
When You Should Call a Pro Install ?
While I enjoy tackling DIY projects and saving money where I can, I’ve learned that not every coaxial cable setup is worth doing on my own. In certain situations, calling in a professional isn’t just about convenience it’s about doing the job safely, legally, and with long-term reliability in mind. If your project is more complex than a single-room setup, here’s when you should seriously consider hiring a pro:
When to Call a Professional Installer
1.Complex or Large Installations
If your setup involves long cable runs, multi-room distribution, or routing through walls, attics, or crawl spaces, a professional has the tools and experience to do it cleanly and safely.
Outdoor or rooftop installations like running coax from a satellite dish or antenna can involve weatherproofing, grounding, and working at heights, which are best left to trained techs.
Systems that feed multiple TVs, modems, or security cameras often require signal balancing, amplification, and correct splitter placement to avoid loss.
2.Local Codes, Permits & Shared Infrastructure
If you’re working in a shared building, condo, or commercial space, DIY work may be restricted or require approval due to local codes or building policies.
Installations that involve service provider demarcation points (where your cable service connects to your home) might require special access, grounding, or testing another reason to go pro.
What You Get With a Professional Installation
Expertise & Clean Work
Pros ensure correct cable and splitter selection, avoid unnecessary signal drops, and comply with grounding requirements and safety codes.
They often provide labeled terminations, so future maintenance or upgrades are easier.
Advanced Tools & Testing
Professional installers use specialized meters to test signal strength, noise levels, and impedance to ensure peak performance.
Many also provide documentation for your installation, which helps if you need to troubleshoot or expand your system later.
For me, knowing when to call a professional has saved time, frustration, and even money in the long run. If your project is more than just plug-and-play, bringing in an expert is usually the smartest move.
How to Maximize Coaxial Cable Signal Quality with Bonus Tips?
Even after the installation is complete, there are a few extra steps I’ve learned that can make a big difference in maintaining strong, consistent signal quality over time. These little details are often overlooked but can help avoid future problems, especially as your system expands or ages. Here are some bonus tips I personally follow to get the best performance out of my coaxial cable setup:
Bonus Tips to Maximize Coaxial Cable Signal Quality
1.Keep Cables Away from Power Lines
When routing coaxial cables, I always make sure to keep them at least 6 inches away from power lines or high-voltage electrical cables. Running them too close can introduce electromagnetic interference (EMI), which degrades signal quality. If they need to cross, I do it at a 90-degree angle to minimize exposure.
2.Replace Old or Damaged Cables
Over time, coaxial cables can degrade especially if they’ve been exposed to moisture, UV light, or frequent bending. I make it a point to inspect and replace any older or worn-out cables, especially those with cracking jackets or corroded connectors. Fresh cable means better shielding and stronger signal flow.
3.Use RG6 Instead of RG59 for Modern HD Setups
For any modern TV or internet connection, I always choose RG6 cable over RG59. RG6 has thicker insulation and better shielding, which makes it ideal for high-definition signals, digital TV, and broadband internet. RG59 is okay for short analog runs, but in my experience, upgrading to RG6 makes a noticeable difference.
4.Label Cables for Easy Troubleshooting
Labeling might sound like a small thing, but it’s saved me tons of time later. I now label both ends of every coaxial cable especially in multi-room setups or when using splitters. This makes it easy to identify which cable goes where and troubleshoot issues quickly without having to trace each wire by hand.
By following these simple but powerful tips, I’ve been able to maintain excellent signal quality and reduce the chances of frustrating connection problems. A little extra effort during and after installation goes a long way!
Yihetai’s Role in Signal-Safe Cable Solutions (Optional Brand Plug)
After working through the different methods of coaxial cable installation and tips to prevent signal loss, I realized that the quality of the cable and components themselves is just as important as how you install them. That’s where brands like Yihetai come into play especially if you’re serious about long-term performance, reliability, and professional-grade results. Whether you’re a hands-on DIYer or a commercial installer, here’s how Yihetai helps make signal-safe cable solutions easy and accessible:
Yihetai’s Role in Signal-Safe Cable Solutions
Custom Coaxial and Signal Cables with Minimal Signal Loss
Yihetai designs and manufactures high-performance custom coaxial and signal cables specifically engineered to reduce signal attenuation, even over longer runs. Our cables are built to handle HD, internet, and surveillance signals without degradation.
Overmolded Connectors for Weatherproof Protection
For outdoor or rooftop installations, our overmolded cable assemblies offer excellent moisture and environmental protection. This helps maintain clean signal transmission even in harsh weather, which is critical for satellite or security camera setups.
Fully Tested for Quality and Durability
Every cable assembly is 100% tested for impedance, signal performance, and durability, ensuring it meets or exceeds industry standards. With certifications like ISO 9001:2015, UL, and IATF16949, you can trust Yihetai for consistent, professional-grade quality.
Support for Both DIYers and B2B Installers
Whether you’re a DIY enthusiast working on a single-room setup or a B2B installer managing complex, multi-unit projects, Yihetai offers flexible support, quick response times, and customized cable solutions tailored to your specific needs.
With the right products and the right practices, achieving a signal-safe installation doesn’t have to be complicated. Yihetai is here to help every step of the way from planning to production to performance.
Conclusion
After going through all the pros and cons, I can confidently say that both DIY and professional coaxial cable installation have their place. It really depends on your setup, your goals, and how comfortable you are with the process.
If you are working on a simple and short run connection, like setting up a TV in one room, and you have the right tools along with some free time, then doing it yourself can be a smart and cost-effective choice. It gives you full control and a sense of accomplishment.
On the other hand, for more complex installations, especially those requiring high performance, multi-room wiring, or used in commercial environments, I strongly recommend going with a professional. It guarantees better reliability, proper testing, and peace of mind.
In the end, choosing the right path depends on what you need and how much you want to invest in getting the best signal possible.